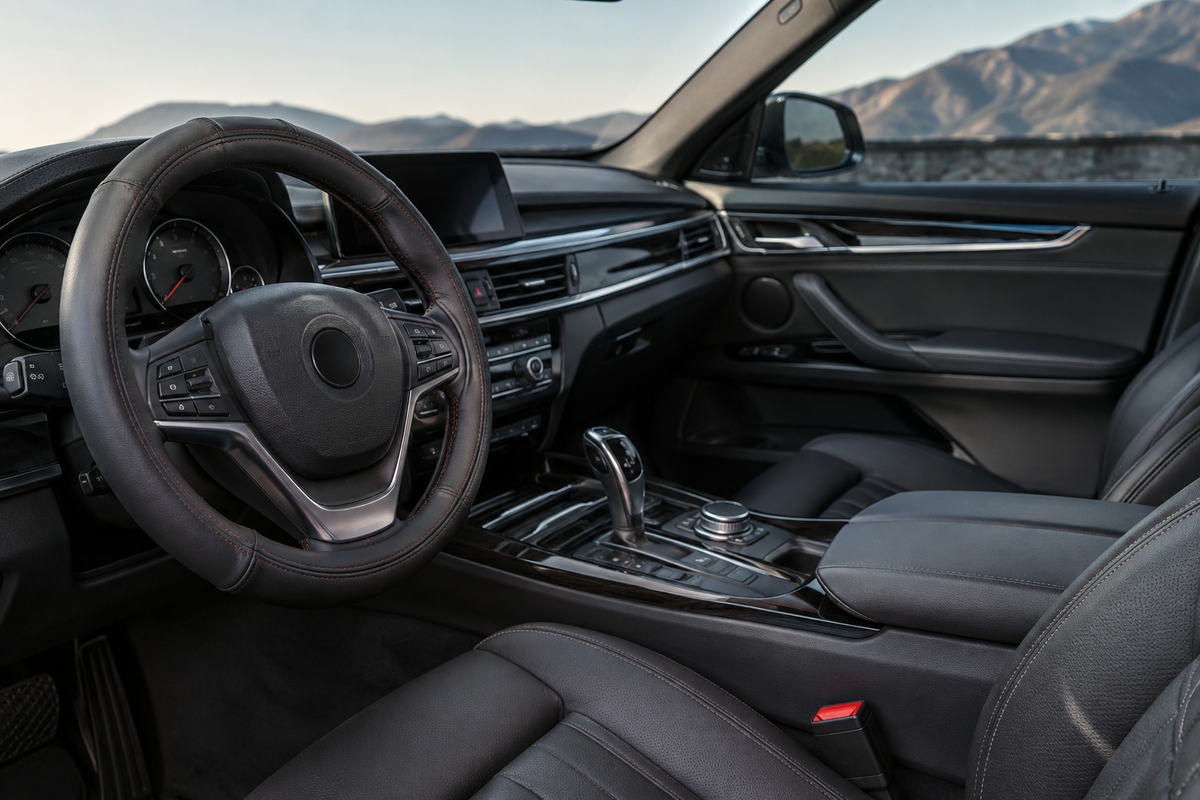
Article: Car Wheel Cover With Premium Leather And Memory Foam Support
Car Wheel Cover With Premium Leather And Memory Foam Support
Overview & Quick Summary
This comprehensive installation guide will walk you through the proper process of fitting your 15-Inch Leather Car Steering Wheel Cover onto your vehicle's steering wheel. Designed for drivers who value both comfort and style, this tutorial ensures you achieve a secure, wrinkle-free installation that maximizes the cover's non-slip grip, protective qualities, and premium appearance. Whether you're a daily commuter seeking ergonomic relief or a car enthusiast upgrading your interior aesthetics, this guide provides clear, step-by-step instructions to help you transform your driving experience with minimal effort and professional results.
Installing a steering wheel cover correctly is essential to ensure safety, comfort, and longevity. A poorly fitted cover can slip during driving, create distracting wrinkles, or fail to provide the intended grip and protection. By following this guide, you'll learn how to measure your steering wheel accurately, prepare the cover for installation, and use proven techniques to achieve a snug, secure fit. The entire process typically takes 15-20 minutes and requires no special tools—just patience and attention to detail. Once complete, you'll enjoy enhanced comfort, improved grip control, and long-lasting protection for your original steering wheel.
- Estimated Time: 15-20 minutes
- Difficulty Level: Easy to Moderate
- Applicable Item: 15-Inch Leather Car Steering Wheel Cover – 38CM Non-Slip Protective Grip
Tools & Materials Checklist
Before beginning the installation process, gather all necessary materials to ensure a smooth, efficient experience and professional results.
- 15-Inch Leather Steering Wheel Cover (38CM): The primary product—ensure it matches your steering wheel diameter (measure the outer edge of your steering wheel to confirm 38 cm / 15-inch compatibility)
- Measuring Tape or Ruler: Flexible measuring tape (minimum 40 cm length) to accurately measure your steering wheel's outer diameter and circumference
- Warm Water (Optional): Approximately 1-2 cups of warm (not hot) water in a bowl to soften the leather cover for easier stretching during installation
- Clean Microfiber Cloth: Lint-free microfiber cloth for cleaning the steering wheel surface before installation and wiping excess moisture
- Mild Soap or Automotive Interior Cleaner: pH-neutral cleaning solution to remove oils, dirt, and residue from the original steering wheel surface
- Hair Dryer (Optional): Low to medium heat setting to gently warm the leather cover, making it more pliable and easier to stretch over contoured areas
- Isopropyl Alcohol (70% or higher): Small amount (2-3 tablespoons) for final degreasing of the steering wheel surface to ensure maximum adhesion and grip
- Latex or Nitrile Gloves (Optional): One pair to maintain cleanliness and prevent transferring oils from your hands to the leather during installation
Important Precautions & Warnings
- Verify Steering Wheel Compatibility Before Installation: Always measure the outer diameter of your steering wheel accurately before attempting installation. This cover is designed specifically for 38 cm (15-inch) diameter steering wheels. Installing on an incompatible size (too large or too small) can result in loose fit, slipping during driving, bunching, or excessive stretching that damages the cover material. Measure at the widest point across the outer edge of your steering wheel, and check the shape—some D-shaped or oval steering wheels may not be compatible even if the diameter matches.
- Avoid Excessive Heat Exposure: While gentle warming with a hair dryer on low-to-medium heat can help soften the leather for easier installation, never use high heat, boiling water, or prolonged direct heat. Excessive temperatures (above 140°F / 60°C) can cause the leather-style material to warp, crack, discolor, or lose its non-slip coating. If using warm water to soften the cover, ensure the water is comfortably warm to the touch—not scalding—and limit soaking time to 2-3 minutes maximum.
- Ensure Complete Dryness Before Driving: If you use water or cleaning solutions during the preparation or installation process, allow the steering wheel and cover to dry completely before operating your vehicle. Moisture trapped between the cover and steering wheel can cause slipping, reduce grip effectiveness, promote mold or mildew growth, and potentially compromise steering control. Wait at least 30-60 minutes after installation, or use a clean, dry microfiber cloth to thoroughly remove all moisture before driving.
- Do Not Install While Vehicle Is Running: Always perform the installation with the engine off and the vehicle parked in a safe, well-ventilated location. Installing a steering wheel cover while the engine is running or the vehicle is in motion poses serious safety risks, including accidental airbag deployment, loss of steering control, and personal injury. Ensure the parking brake is engaged and the transmission is in park (or first gear for manual transmissions) throughout the entire installation process.
Step-by-Step Installation Instructions
Step 1: Measure and Verify Your Steering Wheel Compatibility
Before beginning the installation process, you must accurately measure your vehicle's steering wheel to ensure a proper fit for this 38cm (15-inch) leather cover. Using a flexible measuring tape, measure the outer diameter of your steering wheel from the outermost edge on one side to the outermost edge directly across on the opposite side, passing through the center point. Hold the tape firmly but without compressing the existing wheel material, and take your measurement at the widest point of the wheel's circumference. Additionally, examine the shape of your steering wheel—this cover is designed for standard round steering wheels and may not fit properly on D-shaped, flat-bottom, or irregularly shaped sport steering wheels. Check the thickness of your steering wheel's grip area as well; the ideal grip diameter should be between 3.5cm to 4.5cm for optimal fit and comfort.
Record your measurements with precision, noting that the 38cm specification refers to the outer diameter measurement taken across the entire wheel face. If your steering wheel measures between 37cm and 39cm, this cover should provide an acceptable fit with proper installation technique. Wheels measuring outside this range may result in either excessive looseness (causing the cover to slip during driving) or extreme tightness (making installation nearly impossible and potentially damaging the cover material). This verification step is critical because an improperly sized cover compromises both safety and comfort, potentially interfering with your grip control during operation and creating a hazardous driving condition.
- Measurement Technique: Place the measuring tape across the steering wheel's face at the 3 o'clock and 9 o'clock positions for the most accurate diameter reading, ensuring the tape passes directly through the wheel's center hub.
- Mistake to Avoid: Never measure only the grip circumference or the inner diameter of the wheel—these measurements will not correspond to the 38cm specification and will lead to ordering an incompatible product.
- Pro Tip: Take photographs of your steering wheel from multiple angles and keep your measurements written down for future reference when purchasing additional automotive accessories or replacement covers.
Step 2: Prepare the Steering Wheel Surface and Work Environment
Thoroughly clean your steering wheel before installation to ensure the cover adheres properly and to remove any contaminants that could affect grip performance. Use a mild automotive interior cleaner or a solution of warm water mixed with a small amount of gentle dish soap (approximately one teaspoon per cup of water) applied to a microfiber cloth. Wipe down the entire steering wheel surface, paying special attention to areas where oils from your hands have accumulated, typically at the 10 o'clock and 2 o'clock positions where drivers most frequently grip the wheel. Work methodically around the entire circumference, cleaning both the front gripping surface and the back side of the wheel. After cleaning with the soap solution, use a second clean, damp microfiber cloth to remove any soap residue, then dry the wheel completely with a third dry cloth.
Allow the steering wheel to air dry for at least 10-15 minutes after wiping to ensure no moisture remains on the surface, as any dampness can cause the leather cover to slip during installation or create an unpleasant odor when trapped between the cover and the original wheel. Position your vehicle in a comfortable, well-lit workspace—ideally in a garage or covered area with ambient temperature between 65°F and 75°F (18°C to 24°C). Extreme cold temperatures can make the leather cover stiff and difficult to stretch, while excessive heat above 85°F (29°C) may make the material too pliable and difficult to position accurately. Ensure you have adequate working time of at least 20-30 minutes without interruption, as rushing the installation process often leads to improper alignment and wrinkles in the cover material.
- Surface Preparation Technique: For heavily soiled steering wheels, consider using isopropyl alcohol (70% concentration) on stubborn spots, but test on an inconspicuous area first to ensure it doesn't damage your original wheel finish.
- Mistake to Avoid: Never use silicone-based or oil-based cleaners, protectants, or conditioners on the steering wheel before installation, as these create a slippery surface that prevents the non-slip backing from gripping properly.
- Pro Tip: Wash your hands thoroughly before beginning installation to prevent transferring oils or dirt onto the new leather cover during the fitting process, which helps maintain the cover's pristine appearance and grip texture.
Step 3: Position and Align the Cover at the Top Center Point
Remove the leather steering wheel cover from its packaging and inspect it for any manufacturing defects, noting the inside surface which features the non-slip grip texture. Identify the cover's top center point—many covers have a subtle seam or marking at the 12 o'clock position, though this particular cover may have a uniform construction. Hold the cover with both hands at approximately the 10 o'clock and 2 o'clock positions, then position the top edge of the cover opening at the 12 o'clock position of your steering wheel. Begin working the cover onto the wheel by pulling the material over the top section first, ensuring that approximately 3-4 inches of the wheel's circumference at the top is fully covered and that the cover's inner non-slip surface is making complete contact with the wheel surface. Check that the cover is centered laterally—there should be equal amounts of exposed steering wheel visible on both the left and right sides at this initial stage.
Take your time with this alignment phase, as proper positioning at the start determines the final fit quality and appearance. The cover should extend approximately 2-3 inches down each side from the top center point before you proceed to the next stage. This initial positioning typically takes 2-3 minutes of careful adjustment and visual verification. Ensure the cover's stitching or seam lines (if present) are perfectly aligned with the steering wheel's vertical centerline when viewed from the driver's seat position. Any misalignment at this stage will compound as you work around the wheel, potentially resulting in twisted or bunched material that compromises both aesthetics and safety grip performance.
- Alignment Technique: Use the vehicle's horn button or center emblem as a visual reference point to ensure the cover is perfectly centered and straight before proceeding with further installation steps.
- Mistake to Avoid: Don't attempt to pull the cover down both sides simultaneously at this stage—focus exclusively on securing the top center section first to establish a proper anchor point for the remaining installation.
- Expected Result: When correctly positioned, the top section should lie flat against the wheel without wrinkles or air pockets, and you should see symmetrical exposure of the original wheel on both left and right sides.
Step 4: Stretch and Work the Cover Around the Wheel Circumference
With the top section secured, begin the progressive stretching process by working on one side at a time. Choose either the left or right side and grip the cover edge firmly with both hands at approximately the 3 o'clock position (or 9 o'clock if working the left side first). Using steady, firm pressure, pull the cover material down and around the wheel's curve while simultaneously using your thumbs to push the inner edge of the cover over the wheel's surface. Work in small increments of 1-2 inches at a time, moving progressively around the wheel's circumference in a smooth, continuous motion. The leather material will offer resistance—this is normal and expected. Apply consistent pulling force of moderate intensity, roughly equivalent to the effort needed to stretch a new pair of leather gloves, while avoiding sudden jerking motions that could tear the material or cause it to slip off the already-covered top section.
Continue this stretching and positioning technique around the entire circumference, alternating between the left and right sides to maintain balanced tension and even coverage. Each side should take approximately 5-7 minutes of focused effort to work down to the 6 o'clock (bottom) position. As you approach the bottom section, the remaining uncovered portion will become increasingly difficult to stretch over the wheel—this is the most challenging phase of installation and requires the greatest force application. If you encounter excessive resistance, pause and verify that all previously covered sections are properly seated and haven't bunched or folded, as accumulated material folds create additional tension that makes completing the installation nearly impossible. The total stretching and positioning phase typically requires 15-20 minutes of continuous effort for optimal results.
- Stretching Technique: Use a rocking motion—pull the cover edge over the wheel while simultaneously rotating your wrists to help the material conform to the wheel's curved shape, which reduces stress on any single point of the cover.
- Mistake to Avoid: Never use sharp tools, screwdrivers, or other implements to pry or force the cover over the wheel, as these will puncture or tear the leather material and void any product warranty or return options.
- Pro Tip: If the leather feels excessively stiff and resistant, use a hair dryer on low heat setting held 6-8 inches away from the cover material for 15-20 seconds to gently warm and soften the leather, making it more pliable and easier to stretch—but never overheat as this can damage the material.
Step 5: Secure the Bottom Section and Perform Final Adjustments
The final 3-4 inches at the bottom center (6 o'clock position) of the steering wheel represents the most challenging portion of the installation. With approximately 85-90% of the wheel now covered, grip the remaining uncovered edges of the cover with both hands, positioning your fingers on the inside edge and your thumbs on the outside. Pull the material firmly downward and outward simultaneously, using a combination of stretching force and a slight twisting motion to work the last section over the wheel. You may need to recruit a second person to help hold the already-installed sections in place while you apply maximum force to the remaining uncovered area. Apply strong, sustained pulling pressure for 10-15 seconds at a time, then release briefly to prevent hand fatigue, and repeat this cycle until the cover edges meet and overlap at the bottom center point. The final seating typically requires 3-5 minutes of concentrated effort and may cause temporary hand discomfort from the gripping and pulling force required.
Once the cover is completely positioned around the entire wheel circumference, perform a thorough inspection and adjustment phase. Run your hands around the entire wheel, smoothing out any wrinkles, folds, or air pockets by massaging the leather material and redistributing tension evenly. Pay particular attention to the areas behind the steering wheel where your hands don't typically grip, as these sections often develop small folds during installation. Rotate the steering wheel through its full range of motion (lock-to-lock) several times while the vehicle is parked and turned off, observing whether the cover shifts, rotates, or bunches at any point. If you notice any movement, remove your hands from the wheel and observe whether the cover returns to its original position—a properly installed cover should remain stationary on the wheel without any slippage. Allow the cover to settle for 10-15 minutes before driving, giving the non-slip backing time to fully engage with the wheel surface and the leather material time to conform to the wheel's contours under ambient temperature conditions.
- Final Seating Technique: For stubborn bottom sections, try pulling one side completely to the 6 o'clock position first, then work the opposite side down to meet it, rather than attempting to bring both sides down simultaneously in perfect symmetry.
- Mistake to Avoid: Don't accept visible wrinkles or bunched material as "good enough"—these imperfections will become more pronounced with use and can create uncomfortable pressure points or interfere with proper grip during driving.
- Pro Tip: After your first drive with the new cover installed (approximately 15-20 minutes of normal operation), re-inspect the cover and perform minor adjustments if needed, as the warmth from your hands and the vehicle's interior will cause the leather to become more pliable and may allow for improved positioning and wrinkle elimination.
How to Verify Your Steering Wheel Cover Installation Was Successful
- Complete 360-Degree Coverage Without Gaps: Inspect the entire circumference of your steering wheel to ensure the leather cover sits flush against the wheel surface with no visible gaps, bunching, or exposed sections. The seam should be perfectly aligned along the bottom center of the wheel, creating a clean, professional finish. Run your hand around the entire wheel to feel for any loose areas or sections where the cover hasn't fully conformed to the wheel's contours.
- Firm, Non-Slip Grip During Test Maneuvers: While stationary (engine off), grip the wheel at the 3 o'clock and 9 o'clock positions and apply firm rotational pressure in both directions. The cover should remain completely stationary without any twisting, sliding, or movement independent of the wheel itself. During your first drive, perform gentle steering movements at low speeds to confirm the cover maintains its position during actual use, providing confident tactile feedback through every turn.
- Smooth, Wrinkle-Free Surface Texture: Examine the leather surface under good lighting to verify there are no wrinkles, creases, or puckered areas that could indicate improper stretching or installation. The memory foam padding should create uniform cushioning around the entire wheel, providing consistent thickness and comfort at all grip points. The leather should appear taut and professionally fitted, similar to a factory-installed cover, with the natural grain pattern flowing smoothly around the wheel's curve.
- Comfortable Hand Positioning and Enhanced Grip Control: Place your hands in your normal driving positions and assess the comfort level and grip quality. Your fingers should naturally conform to the premium leather surface, with the memory foam support reducing pressure points during extended holding. The non-slip texture should provide noticeably improved traction compared to your original wheel surface, especially if your palms are slightly moist, giving you enhanced steering control and reduced hand fatigue during longer drives.
Troubleshooting Common Installation Issues
Cover Rotates or Shifts During Steering
- Likely Cause: The cover was not stretched sufficiently during installation, leaving slack material that allows movement between the cover and the wheel surface. This commonly occurs when installers rush the process or fail to work the leather incrementally around the entire circumference, or when the cover size doesn't perfectly match the wheel diameter (using a 38cm cover on a wheel significantly smaller or larger than 15 inches).
- Solution: Remove the cover completely and restart the installation process with greater attention to achieving maximum stretch. Use the warm water or hair dryer method to make the leather more pliable, then work in smaller sections (2-3 inches at a time), pulling the material taut before securing each segment. Ensure you're applying firm, consistent tension as you lace or position each section. If the problem persists after reinstallation, verify your wheel measures 38cm (approximately 15 inches) in circumference—if there's a significant size mismatch, you may need to exchange for the correct size cover from Delicate Leather.
Visible Gaps or Bunching at Certain Sections
- Likely Cause: Uneven distribution of material during installation creates areas where excess leather accumulates while other sections are stretched too thin. This typically happens around the wheel's contoured areas, spoke connections, or grip sections where the diameter varies. It can also result from starting the installation at an incorrect position or failing to maintain consistent tension throughout the process.
- Solution: Identify the problem area and carefully loosen the cover in that region and the surrounding 6-8 inches. Redistribute the leather material by gently working it around the wheel, smoothing out bunched areas and pulling material toward gaps. Use your thumbs to massage the leather into proper position, ensuring the memory foam padding sits evenly beneath. For persistent bunching, apply gentle heat with a hair dryer (low setting, 6-8 inches away) to make the leather more malleable, then reshape it while warm. Always work from the center of the problem area outward, gradually redistributing material until you achieve a smooth, uniform appearance.
Difficulty Gripping or Uncomfortable Pressure Points
- Likely Cause: The memory foam padding has shifted during installation, creating uneven thickness distribution that results in lumpy areas or thin spots. This can also occur if the cover was over-stretched in certain areas, compressing the foam unevenly, or if the seam placement ended up at a primary grip point (such as 3 o'clock or 9 o'clock positions) rather than at the bottom center where it's less noticeable during normal driving.
- Solution: With the cover still installed, gently massage the affected areas with your palms using circular motions to redistribute the memory foam padding beneath the leather surface. Apply moderate pressure and work slowly to encourage the foam to spread evenly. If a seam is causing discomfort at a primary grip point, you'll need to remove and reinstall the cover, ensuring the seam aligns at the 6 o'clock (bottom center) position where your hands rarely grip during normal driving. During reinstallation, periodically check that the memory foam layer remains evenly distributed by feeling the cover's thickness at multiple points around the wheel before final tightening or lacing.
Long-Term Maintenance and Care Tips for Your Premium Leather Steering Wheel Cover
To preserve the luxurious appearance and functional performance of your Delicate Leather steering wheel cover for years to come, establish a simple but consistent care routine. Clean the leather surface weekly using a slightly damp microfiber cloth to remove oils, dirt, and perspiration that naturally transfer from your hands during driving—these contaminants can gradually degrade leather quality if left unaddressed. Every 4-6 weeks, apply a premium leather conditioner specifically formulated for automotive use, working a small amount into the leather using gentle circular motions and allowing it to absorb for 10-15 minutes before buffing away any excess. This conditioning process replenishes the natural oils in the leather, preventing drying, cracking, and premature aging while maintaining the supple texture and rich color. Avoid using harsh chemical cleaners, alcohol-based products, or excessive water, as these can damage both the leather surface and the memory foam core.
Protect your investment from environmental factors that accelerate wear. When parking in direct sunlight for extended periods, use a windshield sunshade to minimize UV exposure and heat buildup, both of which can cause leather to fade, dry out, and become brittle over time. If you live in an extremely hot or cold climate, consider applying a leather protectant spray every few months to create an additional barrier against temperature extremes and moisture. Inspect the cover monthly for any signs of loosening, wear at high-contact points, or seam stress, addressing minor issues immediately before they develop into larger problems. With proper care and attention, your premium leather steering wheel cover will continue delivering superior comfort, enhanced grip control, and elegant aesthetics throughout countless miles of driving, representing an excellent long-term value for your vehicle's interior.
Customer Support and Expert Consultation
At Delicate Leather, we're committed to ensuring your complete satisfaction with every product and your success with every installation. If you encounter any challenges during the installation process, have questions about sizing compatibility for your specific vehicle, or need personalized advice on caring for your premium leather steering wheel cover, our knowledgeable customer support team is ready to assist you. We understand that every vehicle and every driver has unique needs, and we're here to provide the expert guidance that helps you achieve the perfect fit and optimal performance from your investment. Don't hesitate to reach out to Delicate Leather through our website at delicate-leather.com, where you'll find multiple convenient contact options including email support, live chat assistance, and detailed product information. We're passionate about premium automotive leather accessories and take pride in helping our customers enjoy the enhanced comfort, safety, and style that our carefully crafted products deliver mile after mile.