How to Put a Sun Visor in Your Car: A Step-by-Step Guide
How to Put a Sun Visor in Your Car: A Step-by-Step Guide
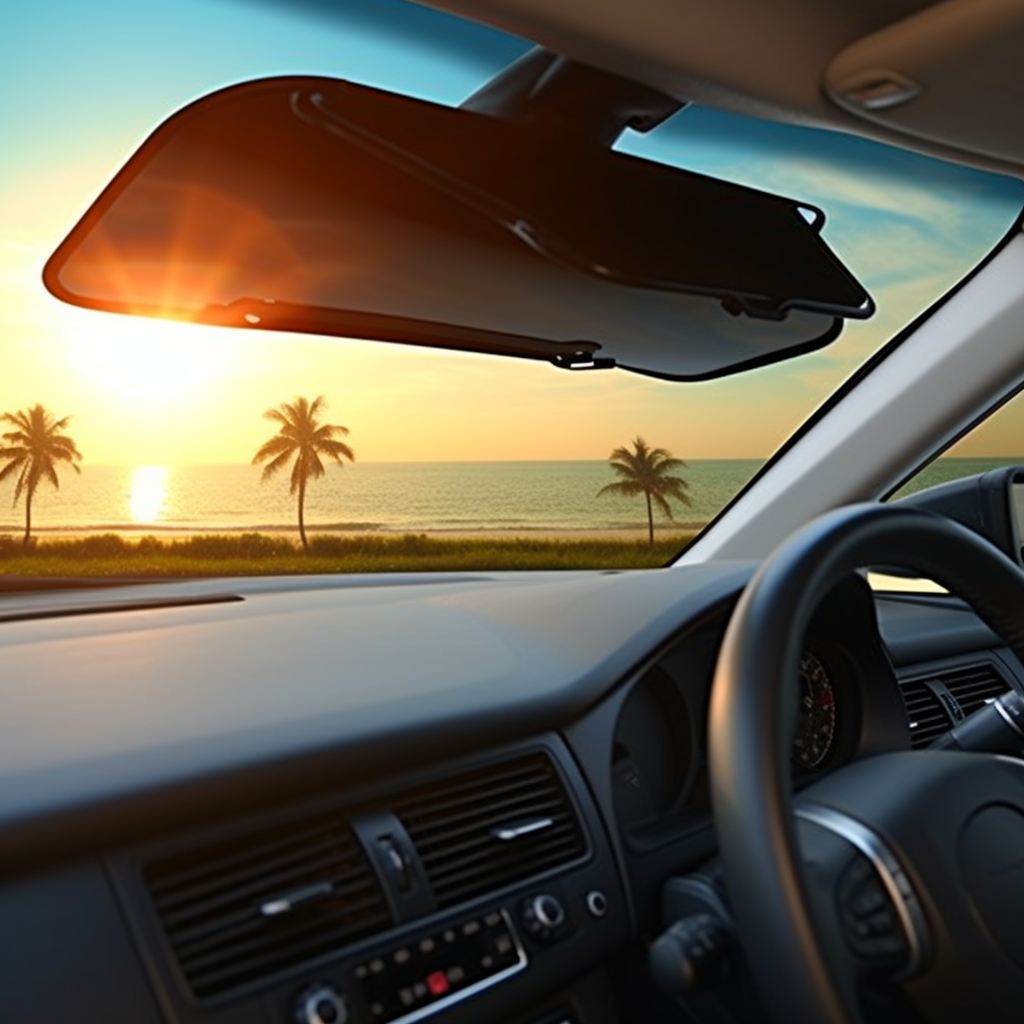
Installing a sun visor in your car is a relatively simple process that can greatly enhance your driving experience by providing shade and reducing glare. Whether you're replacing an old visor or adding a new one, this step-by-step guide will walk you through the process of putting a sun visor in your car.
Tools and Materials You'll Need:
Before you begin, gather the necessary tools and materials:
- New sun visor
- Screwdriver (flathead or Phillips, depending on your car)
- Screws (if not included with the visor)
- Trim removal tool (optional)
Step 1: Choose the Right Sun Visor:
Select a sun visor that is compatible with your car's make and model. Consider factors like size, color, and any additional features you may want, such as a vanity mirror or extension arm.
Step 2: Position the Visor:
Hold the new sun visor up to the mounting bracket on the ceiling of your car. Ensure that the mounting holes on the visor align with the holes on the bracket.
Step 3: Remove the Old Visor (if applicable):
If you're replacing an old visor, you'll need to remove it first. Lower the visor to its lowest position and locate the mounting screws on the bracket. Use a screwdriver to remove the screws and detach the old visor from the bracket.
Step 4: Attach the New Visor:
Hold the new visor up to the bracket and insert the screws into the mounting holes. Use a screwdriver to tighten the screws securely. Make sure the visor is attached firmly to the bracket.
Step 5: Test the Visor:
Before you finish the installation, test the visor by moving it up and down. Ensure that it stays in place when you position it. If the visor droops or falls down, it might not be attached correctly.
Step 6: Check for Extension Arm (if applicable):
If your new sun visor has an extension arm, make sure it functions properly. Extend and retract the arm a few times to ensure smooth movement.
Step 7: Test the Vanity Mirror (if applicable):
If your new visor comes with a vanity mirror, open and close it to make sure it works as intended.
Step 8: Final Adjustments:
Adjust the visor to your preferred angle to block out sunlight and reduce glare. Some visors also have side extensions that can be pulled out for additional coverage.
Step 9: Replace any Trim or Covers (if applicable):
If you removed any trim or covers during the installation, such as those around the mounting bracket, make sure to replace them.
Step 10: Additional Tips:
- If your car's ceiling has fabric upholstery, be careful not to damage it while removing or attaching the visor.
- If you encounter any resistance while tightening the screws, stop immediately to avoid stripping the screw holes or damaging the visor.
- Some visors may have specific installation instructions provided by the manufacturer. Be sure to follow those instructions if they differ from the general steps outlined here.
Benefits of Properly Installed Sun Visors:
Properly installing a sun visor in your car offers several benefits:
-
Reduced Glare: A sun visor blocks out the sun's glare, making it easier and safer to drive, especially during sunrise or sunset.
-
Enhanced Visibility: By reducing glare, a sun visor allows for clearer visibility of the road ahead, preventing accidents caused by impaired vision.
-
Protection from UV Rays: Sun visors provide a barrier against harmful UV rays, protecting your skin and your car's interior from sun damage.
-
Increased Comfort: With a sun visor in place, you'll experience increased driving comfort, as you won't have to squint against bright sunlight.
-
Safer Driving: Improved visibility and reduced glare contribute to a safer driving experience for both you and other road users.
Conclusion:
Installing a sun visor in your car is a straightforward process that can significantly improve your driving comfort and safety. With the right tools and careful execution, you can enjoy the benefits of reduced glare and enhanced visibility on the road. Whether you're replacing an old visor or adding a new one with additional features, following these steps will ensure a successful installation and a more enjoyable driving experience.
